...

6/5/12

Home Sweet Rental - Platform Bed

I've been sitting on this one for a while, its not super-exciting but I want to continue to make these home improvement posts because they make me really happy! I'm not really at ease with my living situation for several reasons, but as it stands I have no real reason to move - aside from general dislike for the place. So, what can I do but divert my angst in to decorating and improvement projects?

I've found Anna Dorfman's Door Sixteen and Daniel Kanter's Manhattan Nest sources of incredible inspiration and while I can only do so much at once I really hope that I can have homes as beautiful as theirs some day. This will also mean re-doing this blog so it is both more attractive and more manageable. One thing at a time though.

So, I had - to my great embarrassment - been living without a real bed frame for quite some time, and it really, really had to change. My first thought was IKEA, but as it turns out their bed frames are not as cheap as you might expect. Particularly if you are being fussy, as I was and looking for a platform storage bed. I am always on the lookout for new storage solutions, and like the contemporary vibe of the platform bed. To my pleasant surprise, Home Depot had what I was looking for in the end! The Southshore URBEN is very well priced and very much what I was after. I ordered.

The reviews mentioned that it was a bit of a handful, assembly-wise but I must tell you - there is little I love more than assembling furniture. This was going to be great.
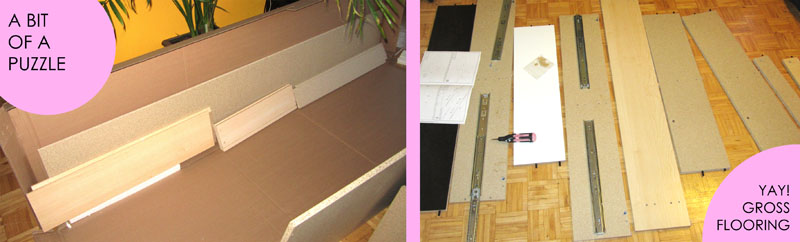


It took a lot of careful instruction reading, but I got the project going. Once I was familiar with their method of explaining things it really wasn't difficult either. Just about everything did what it was meant to, though I did have to call Pietro in several times to help me hold this or that.


The only step that really gave me any grief was the building of the actual drawers. There were some plastic bits that weren't molded 100% as they ought to be, and required some man-power to twist in to submission. 


The whole process probably took a solid two hours, and if I'm being honest, the finished product - while exactly what I wanted, just doesn't look very impressive. I've got big plans on continuing to improve my bedroom, new sheets are on the way, new paint job is certainly in order, and its time to get rid of old art that I'm simply hanging on the walls for lack of a better place. I hope you'll bear with me as I continue to make these improvements.


4/23/12

Home Sweet Rental - White & Yellow

So just over a week ago, we assembled what was needed and braced ourselves for one of the larger apartment-therapy projects we've done so far; repainting the living-room.

Now, I wasn't totally on-the-ball here. I didn't take any "before" pictures, but I think you'll get the idea anyhow. When we moved in I saw quickly that I was fighting a losing battle on the paint colours chosen. We wound up with a yellow that looked an awful lot like traffic signs, school buses, or even a bit like McDonalds. And I hate yellow, I find it so very obnoxious. Even if NoFrills wasn't such a useless grocery store, I still wouldn't go in. Because yellow.

Anyhow, we weren't going to get rid of all the yellow, Kat decided she wanted to print up some stencils and leave an 'M' and a 'K' on two of the walls (she offered to include Pietro, but really a yellow 'p' ?)


We began with a basic primer (The Canadian Tire brand 'Gliden') which was a very blue-white. It looked like it was glowing, it vibrated so much near the yellow. But we managed to cover pretty much everything. The trim, the doors, the rads. We didn't bother with the ceiling, but the baseboards alone made a HUGE difference.


The primer ran out right around dinner time, and since the apartment was in no shape to prepare food or eat, we travelled down the street to a really nice pub called Stout we hadn't tried yet. It was fantastic! Lots of games lying around (Connect 4!) and very very yummy sweet potato fries.

But I'm getting off-topic.

Sunday morning we all rose bright and early, and fueled by coffee and chocolate croissants (thank you Kat) we ventured back to Canadian Tire to pick up our final colour. A white called 'Snuggle' which was a touch warmer so it wouldn't be so bright against the remaining white. 


Pietro did so much  work for us! Most of the roller-work actually, while Kat was outlining her stencils and I was going around and around painting baseboards, corners, and various edges he was hard at work covering the awful yellow.

And it all worked out very well! The stencils (for which Jessica Hische's 'Buttermilk' was chosen) look fantastic.


While at Canadian Tire we also picked up some new house plants, and some better garbage/recycling solutions which will sit under the sink, which is also a serious improvement. I am so thrilled with the final result, and it really wasn't as much work as I thought it would be. Although I really should have made this post last week when it was all fresh in my mind.


3/12/12

Home Sweet Rental - Ikea Stain

Okay! So as I mentioned I went a little crazy this weekend. I also had purchased some bed side dresser type things from IKEA (called RAST). I purposely bought these because a) they are dirt cheap and b) they are unfinished so I can decorate them as I like.


It took a while to decide what I wanted to do with them, and Pietro's only real suggestion was "paint a whale on mine." But eventually I decided a very dark stain (with no whale as of yet). I wound up choosing a stain from Home Hardware that was stain & finish in one. I'm not sure I would do this again. It was the less expensive option but really, its a little strange. Application is done with a brush instead of a rag, and let me mention now - even if you think you have solvents for oil-based clean-up DOUBLE CHECK. 

In a pinch though, dish soap CAN do the job, if far more slowly.


Now I should probably mention that I am not terribly patient about these projects. Ideally you would lightly test a small amount of stain in a not-too noticeable spot. I sort of did that, and then just went ahead and kept painting.

Also, I probably should have done all this before the drawers were installed. But I needed the storage while I decided what to do with these darn things, so I didn't. You could plan ahead though.


Here you see, 1st coat is finished, and yes one of the little knobs is missing. The wood split as I was screwing it in to place and I haven't glued it back together yet. I'm also considering getting new hardware altogether but really, that isn't happening soon. 

At this point I had to take a break, it was getting late in the day and we had dinner plans to prepare for. 


Day Two was beautiful! So rather than position myself directly beside my open balcony door as I had the day before, I actually dragged everything out there to continue my project. 

I'd have to scrub the first coat of stain with steel wool to prepare for the second layer, and get started on the second set of drawers.


So I'm actually not finished with these guys yet, but again given the drying time required I brought them indoors and set the up. Partially because I don't have space to keep them anywhere else, and partially so I can see how the colour is progressing. I might do a third coat still, but I really doubt it.


If I remember (no promises) I will make a final post when they are both stained.


Home Sweet Rental - Ikea Re-Paint


So I've been trying really hard recently to make the best of our apartment. Its OK. For a two bedroom its actually quite large, but its old. The flooring is just nasty, but I can't do anything about that. 

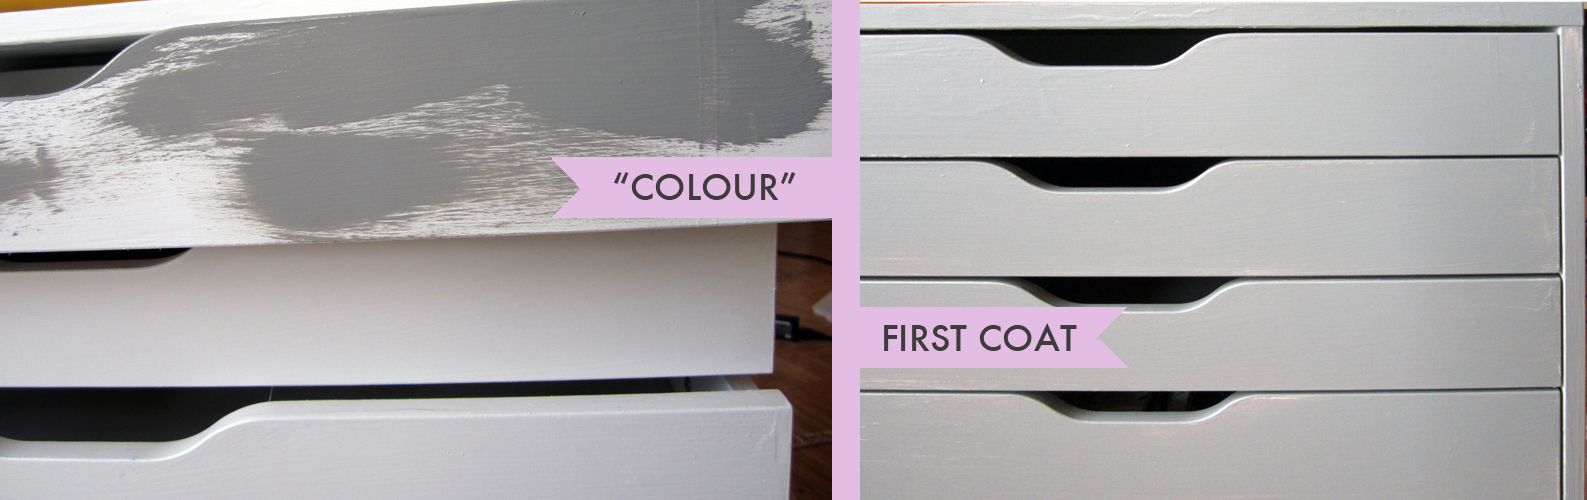
This weekend I went a little overboard, but I'll start with this IKEA storage unit. Its wonderful as far as function is concerned - but it was filthy from its previous owner. It only just occurred to me that I could paint it!

I did some quick Googling to see what the best course of action was for these nasty plastic-laminate pieces of furniture and set off to the hardware store to pick up what was needed.


First step was sanding (read: scratching) the finish up enough for the primer to stick. This wasn't too hard, though I later found the primer really difficult to mix. I wound up with one really watery layer and one very viscous layer. So I recommend more patience and stirring.


 ^ Sanding ^

Once the boring steps of painting white on white were over though - the fun begins!


Aaaaand, I found the oil primer took more time to dry than advertised (which made the latex grey a bit odd on the first layer), to I had to wait overnight to finish up - but I LOVE it. Definitely the right solution to a piece of furniture to dirty & beaten up to clean the traditional way.


2/25/12

Belated Valentines


I should have posted this sooner - but we had such a nice Valentine's Day! I've never really bothered with it before, and Pietro and I weren't really talking too much about making a fuss, but he made me the most delicious dinner!
I only had time for a quick photo but that is sweet potato soup (from scratch) and some yummy arugula salad. There were also some delicious chocolate crackle cookies, courtesy of Wanda's Pie In the Sky cookbook. We've been eating far too many of those yummy gluten-free desserts. (You can find the recipe on the Toronto Star website)

2/23/12

Eternal Pinwheel


So for the last oh, week or two we've been working on designing new patterns at work. And this one above is just murder. Illustrator hates it, I've been staring at the screen just like this for HOURS.

We even upgraded the RAM in our iMacs from 4GB to 8GB and while it helped - it didn't actually fix the problem, I can't even rasterize the damn thing without the computer freezing up altogether. Its pretty, but I'm sick of looking at it.

2/6/12

Where I'm at


Hey everyone!
I've got to get this blog business in order - there is actually a lot going on in my life I'd love to share with you. I've shown you hints of our apartment improvements but seriously, there have been some major improvements made to our little rental!

But today I'm just going to point to some work-related achievements. Some of you may have caught on to where I'm working but for those who haven't - look up!

I've been having a great time as in-house designer creating some funky barware, flirty houseware, and packaging all over the place. Everything on the middle shelf I nursed from concept to display, and soon - VERY SOON I will try to do a real portfolio update with all my new packaging and product.

The photo above is from CGTA in Toronto and damn was it a lot of work, of course it would have been much less work if they hadn't cut all the power during tear-down leaving us to dismantle everything without the aid of power tools. Yikes!